by Mark Bailey | Aug 16, 2019 | GardenLife Magazine, How to guide

Summer house paint colours
Our top summer house colour schemes with real customer photos
Asking “what colour should I paint my summer house?” – Here are our ideas
Choosing the right colour to paint your much loved summer house can be problematic. The last thing you want to do is pay out a small fortune on paint, spend half a day studiously decorating, and then discover your choice of colours doesn’t work. The wrong shade of green could make your summer house disappear into the surrounding plants. Pick a bright colour to help it stand out, get the wrong shade, and you could end up with an eyesore.
To help you pick the best summer house paint colours we’ve selected photos showing real customer summer houses in a range of different colours.
1. Why paint your summer house?

There’s a practical element to painting a summer house or any other timber garden building: it gives protection from the weather, insects, mould and fungus. Even if you opt for a dip treated summer house, we recommend that all our timber buildings are finished with paint or varnish as soon as they are constructed.
But practicality is just the start of it. You can use the colour scheme of your summer house, shed or garden room to say something about yourself, complement certain aspects of your garden, help the building blend into the background or make it a focal point of your garden design.
2. Choosing a summer house paint colours

A dash of paint can be the difference between a traditional English-style summer house and a contemporary garden office. It can conjure up the beach, a Nordic forest, the Scottish Highlands, some urban cool, or leave the eye free to focus on the plants around it.
And for those who already own a summer house, a paint job is a relatively hassle-free way to transform or revive an ageing garden building.
Obviously, that’s empowering; it’s also a bit daunting. Given the power of colour to transform, where on earth do you start?
3. A few basics about choosing a paint colour for a summer house
The ‘classic’ summer house paint scheme is to have the walls in a darker shade, and the doors and windows a lighter shade – white, cream, or a paler shade of the wall colour.
Greens, beiges and greys work well with this format, as do a wide variety of styles and sizes of building. A great example is the beige and crisp white scheme one of our customers used on a traditional clockhouse garden building, which has been nicely enhanced with garden furniture and topiary.

For a darker colour scheme, look at the dark/light combination on this Melanie corner summer house. The olive-green walls help it blend with rest of the garden, whilst the blue plant pots add a dash of colour.

4. Bold and bright Summer house paint colours
The darker walls / lighter trim approach works well with bolder colours too. You’re making more of a statement, but still not breaking any rules. Blue and white gives a good nautical or vintage feel, and colour contrast also helps to highlight the excellent design, build and features of a summer house. Take a look at:


We love both these shades of blue, which give a Mediterranean feel in summertime, and inject some cheer in the autumn and winter months, without looking out of place against greyer skies. See how a blue roof can add to the effect.
Another popular colour with our customers is dark red or burgundy. Take a look at these two beauties, both with a distinct Nordic style – one looks like an enviable island summer house, the other is straight out of an enchanted forest. In both cases, the lighter doors and windows add definition.


5. Use just one summer house paint colour
Another option is to use the same colour throughout and it’s interesting to see the different effects this can achieve. Generally, a single colour makes a summer house merge with its surroundings more – though of course it depends on the colour. Pink walls and window frames certainly don’t disappear into the background – however vibrant your garden.
This octagonal Hanna summer house has been painted an attractive pale green which blends with the surrounding garden – it’s certainly not camouflaged or invisible, but it’s not saying ‘Admire my fine door and window features!’ either.

6. Using neutral summer house paint colours
You can take this blending effect a step further with neutral colours, and we particularly like two customer examples of this. First is a modern, white garden room that pulls your eye towards the horizon and lengthens the garden. Lighting inside and out adds warmth to the stripped-down design, and we would happily spend many a day there.

We would also happily while away the summer in this Veronica pavilion and the beautiful garden that surrounds it. With a natural dark wood stain throughout, the structure almost disappears into the surrounding garden. Windows on all sides of the summer house mean the garden is visible from every angle.

7. Stain or paint a summer house with colour?
This brings us onto another basic ‘rule’ about colour – that using stain rather than paint allows the natural grain of the wood to show through. And stain doesn’t have to be brown. Using a pale limewash-effect stain can give a vintage feel, or you could go bolder in your colour choices, as with this Hanna summer house.

Using a stain makes the colour less ‘in-your’ face than paint, and more rustic – not so great if you were looking for a more urban effect.
8. Summer house paint colours for modern living
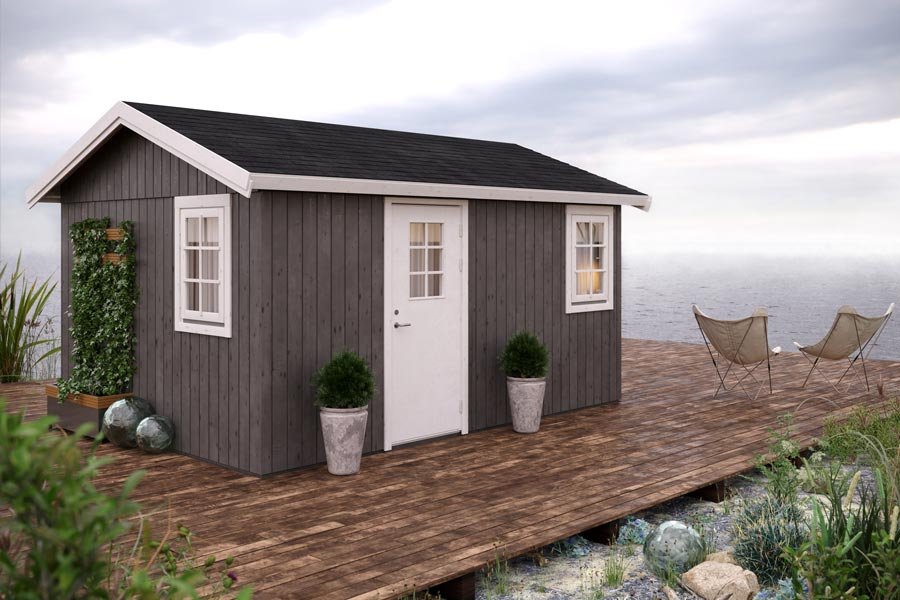
If you’re after a more modern or urban feel for your summer house paint colour choice, matte paint is a good bet. Greys, black, charcoal, or the dark, dark greens and midnight blues that you see on front doors in Amsterdam make a good colour palette here.
These colours make even a traditional summer house look more twenty-first century, and work very on contemporary designs too. A contrasting white or grey trim will catch the eye, as can a reversal of the usual dark/light principle – so you have pale walls and darker doors and/or windows.


9. Adding summer house colour through accessories
Finally, a word about accessories and touches of colour. Borrow a great tip from many a boutique hotel, and use a grey palette (or other neutrals) for walls, floors and doors and add touches of bright colour (eg inspired by flowers and other plants) for anything from cushions to garden furniture to plant pots.

10. Keep things flexible
As well as adding sophistication to the overall look, the ‘boutique hotel’ approach is practical – you can keep the neutral backdrop to your summer house unchanged, and change the accessories to alter the look. A pale-grey Japanese-inspired garden room with minimal decoration could transform into a seaside theme with the addition of some blues, and stripes and different furniture.
Need more summer house paint colour inspiration? Check out more GardenLife Log Cabins customer photos or our Pinterest pinboard on summer house colour schemes.

by Mark Bailey | Jul 12, 2019 | GardenLife Magazine, How to guide

Sustainable garden design – 15 quick and essential tips
It’s odd to think that a garden may not be an environmentally-friendly or natural place. Most have a lawn, greenery and some trees. However, these days it is often normal for paving slabs, non-native species, fences and chemical sprays to prevail. Together, these can all make for a rather hostile and unsustainable habitat that is far from natural.
Creating a sustainable garden design that’s healthy, supportive of nature, an ethical food source, and that is also good for the environment and climate doesn’t have to be a huge commitment however. There are lots of simple steps you can take, and they don’t require expensive kit, specialist environmental knowledge, or a lot of time.
Here are 15 quick steps toward a sustainable garden design that will allow you to turn your lot into a rewarding food source, a haven for indigenous species and an ally of the wider environment and climate.
1. Encourage native trees

Unsurprisingly, native garden wildlife prefers and benefits from indigenous tree species, which means more biodiversity and healthier wildlife in your garden. Native trees such as Alder increase nitrogen levels in the soil, and nitrogen helps other plants grow. Downy Birch and Silver Birch both draw up nutrients from deep within the soil, again, benefitting other nearby plants. You can read more about the benefits of indigenous species on our blog post about planting native British trees. When it comes to a sustainable garden design, you can’t beat native trees that support wildlife and feed and nourish other plants in the garden.
2. Grow a native hedge

Instead of installing a fence or building a wall, what about planting a native hedge instead? A hedge may not provide instant security or privacy, but it will provide pollen, food, shelter and a home for moths, butterflies, spiders, insects, birds and hedgehogs (and with hedgehog numbers in steep decline, a native hedge could make a difference). Building a fence consumes natural resources and can lock out native wildlife. However, a healthy growing hedge helps to capture and store carbon dioxide (which can help fight climate change). A mix of field maple, beech, hawthorn, blackthorn, elder, dog rose, hazel, holly and crab-apple is ideal, but if you do opt for a fence, consider a hedgehog hole.
3. Make a log pile

If you can’t source sustainable logs locally, buy a sack at the local garage, drill some holes in the ends with a 5mm drill bit, and make a small pile in the garden ensuring that the holes catch the morning light. This little log pile will provide a home for numerous insects, beetles, bugs and bees, all of which will help with pollination (and with bee numbers declining rapidly they need all the help they can get). In time the log pile will rot down and the nutrients it releases will benefit other nearby plants.
4. Create a veg patch

The most obvious element of sustainable garden design is a veg patch. It’s incredibly rewarding to cook with your own homegrown food, and growing it doesn’t have to be complicated. Peas, broad beans, purple-sprouting broccoli, beetroot, salad leaves – they’re just some of the great veg you can grow easily in your garden, and they taste so much better than shop-bought versions. You’ll also cut down on pollution and carbon dioxide from food miles that supermarket veg stack up in order to reach your plate. If you don’t have much room that’s not a problem either. To grow your own potatoes all you need is a sack full of soil, you can train peas and beans to grow up around existing trees, and garlic and spring onions will grow in tubs.
5. The same goes for fruit gardens

Even the UK’s unreliable climate produces everything from apples and pears to cherries, blackcurrants, strawberries and rhubarb, and you don’t have to have a huge garden. Pollinators flock to fruit trees and bushes, and if you’ve ever tasted a raspberry or bramble straight off the bush you’ll know there’s something about it that plastic-wrapped fruit just can’t replicate. When you eat seasonal fruit that you’ve grown yourself you are helping to reduce pollution, carbon dioxide and packaging waste. When planning a sustainable garden design, a mix of fruit trees and native trees is a must.
6. Grow salad and herbs in containers

Lack of space, or even a garden, doesn’t have to stand in your way of growing your own. Herbs and mixed salad leaves can thrive in a window box, or if you have space but no soil, a small raised bed. They’ll taste great, and you’ll be saving on food miles. You could also integrate vertical vegetable gardening as part of a sustainable garden design.
7. Make your own compost

All it takes is a bin, and those scraps of food, lawn clippings and garden waste that you would otherwise throw away. The bins themselves are extremely cheap – or you could DIY it with an wooden pallet. Composting will give you a sustainable and nutrient-rich source of soil without having to buy in chemicals or peat-based compost. You’ll save money as well as recycling your waste into a highly useful product.
8. A weed is a flower growing in the wrong place

This may require a mental U-turn for many gardeners. Allowing native grasses, flowers and other plants referred to as “weeds” to flourish could greatly improve your garden, help the wider environment and local wildlife. Native species will attract plenty of pollinators, which could also be helpful for flowers, fruit trees and other plants in your garden. Species such as clover and vetch are often eradicated from lawns and beds, but they are both nitrogen fixers, enriching the soil to the benefit of plants around them. Even if you don’t want weeds growing throughout your garden, setting aside a space for a wildflower patch would be highly beneficial. As with alder and birch trees, having vetch and clover improving the soil is an important part of any sustainable garden design.
9. Spurn the chemicals

Pesticides, weedkillers and solvent/oil-based timber treatments can all make your garden hostile territory for wildlife. With oil being a major ingredient in both the products and manufacturing process they aren’t sustainable either. Chemical traces can linger in soil and water sources for years to come too. Opting for alternatives like organic pesticides or natural herbicides will still get rid of unwanted bugs and weeds without warding off the nice ones. Simpy deadheading weeds before they flower is often a highly effective solution.
10. Look for organic fertilisers

Feeding your garden plants is important to help keep them healthy and strong, but the production and use of chemical fertilisers has a high environmental cost (in resource use, shipping and waste). Chemical fertilisers can also flood water systems with excess nitrogen, which can lead to numerous other environmental problems far afield, such as algal blooms. Instead, for your sustainable garden design consider pine needles and pine wood chip to help enrich acidic soils that ericaceous plants such as rhododendrons and azaleas need. Use wood ash (from a wood burning stove), liquid seaweed solutions (available from most good garden centres), home made compost, and cow manure or horse dung (if you can get them locally) to feed and support plants and naturally improve poor soils.
11. Collect rainwater

Our climate is changing. In the UK we’re seeing more intense downpours and longer, hotter dry spells. If you opt to collect free rain water you’ll avoid paying the financial and environmental cost of getting water from the tap. It’s also worth noting that rainwater is generally better for your plants than chemically-treated tap water. We’ve already got a handy article about using water butts to collect rainwater here. Rainwater collection really is an essential element of sustainable garden design.
12. Help to avoid flooding

With storms and extreme rain becoming more frequent, we can all to do our bit to deal with run-off water. Do whatever you can to avoid paving over your garden, or using paving slabs for patios and garden paths – instead look at alternatives such as woodchip or gravel. If you collect rainwater in butts (above) and allow your garden to soak up heavy downpours, you can reduce runoff and the chances of local flooding.
13. Dig a pond (or make a small rain garden)

Yes, this can seem like quite an undertaking, but in a past blog post we outlined some really straightforward ways to create a pond in your own back garden. You’ll create the perfect habitat for frogs, toads and newts, especially if you dig one with shallow edges for them to slip in and out (avoiding steep sides also reduces the risks of small mammals such as hedgehogs falling in and drowning). Dragonflies and water beetles can usually be spotted after just a few weeks, and birds will use it for drinking.
14. Provide water sources for other wildlife too

Birds and animals need to drink, and in a long hot summer that can be a problem. Bird baths are an easy option, and you don’t necessarily have to go the whole hog with a stone bath – you could just fill a plant pot with water. Meanwhile, a small bowl of water, kept topped up, can attract hedgehogs and keep them around over the summer. There are other tips on making your garden hedgehog-friendly, and since hedgehogs help keep down slugs, they’re definitely a gardener’s friend.
15. Build a bee-hotel

Don’t be deceived by the name – these are easy to build, as you can see in this guide. They’ll support bees (especially solitary ones) which in turn will increase pollination in your garden. All of which means, more beautiful and healthy flowers – not just for you, but all the other gardens in your area!
If you look at the above list, panic, and wonder where to start on your sustainable garden design, don’t worry. You can transition your garden to a more natural wildlife-friendly habitat over time.

by Mark Bailey | Aug 23, 2018 | GardenLife Magazine, How to guide
You’ll be amazed how simple it is to grow your own living willow structure

Cut a ‘whip’ off a willow tree, shove it in the ground at any angle and it will probably grow. Not only that, it will do so even in the swampiest of environments, reliably shooting up a couple of metres a year.
As a result, it’s possible to make gorgeous and practical living willow structures in your garden. Arches, gazebos, pergolas, dens, play areas and even so-called ‘fedges’ can all be constructed from as little as a willow twig. This is a really cost effective design option if you can’t quite afford a more substantial timber gazebo for your garden.
Here are some ideas and advice on creating your own living willow structures.
Preparations for living willow structures

First of all, given there are more species of willow than you can count, you need to pick one. The Royal Horticultural Society (RHS) suggest, ‘Salix alba var. vitellina (golden willow), S. daphnoides, S. alba var. vitellina ‘Britzensis’, S. viminalis and S. purpurea’ as the best living willow varieties to use. More advice about using willow in your garden design can be found on the the RHS website.
Where you plant your willow also requires planning. Ideal growing conditions are moist and in full sunlight. Be aware that their roots spread out rapidly, so pick a spot at least 10m from any buildings or pipes you know of.
In terms of preparing a site for living willow structures, it’s relatively straightforward. All you need to do is mark out your design shape, with string or sand, then install the whips! All of this should ideally be done in winter or early spring, which is when willow whips are normally harvested.
If you’ve already bought willow whips, store the thick ends in water to prevent them from drying out and prune off the end before planting. If you do this don’t allow the water to freeze in winter.
Planting living willow structures
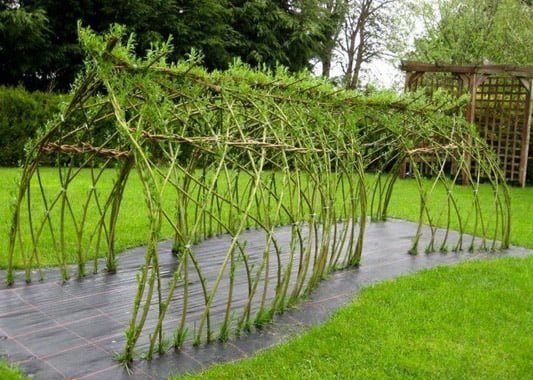
Ideally, the thick end of the whip should be pushed in 20-30cm underground. The drier the ground or longer the rod, the deeper it will need to grow. But given willow’s extraordinary propensity to grow, you may well end up with a flourishing structure however you plant it!
Adding some compost to the soil when planting won’t go amiss. And willow plants actually enrich the surrounding soil themselves, allowing other nearby plants to flourish as long as the roots of the different plants don’t interfere with each other too much. You may also want to put heavy weedsheet around the base of the structure too – this can stop unwanted shoots growing where they aren’t wanted.
Different designs for living willow structures
1. A living willow pergola or arch
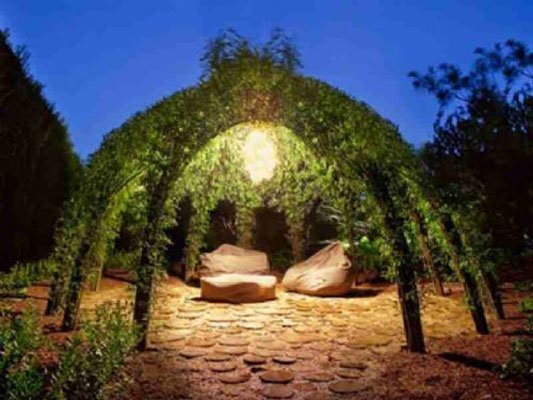
Using the longest willow whips you can get a hold of, plant a row on either side of a wooden arch or pergola, spaced 10-15cm apart. Let them grow straight up, tying them together at the top. It’ll look sparse at first, but weaving new shorts through the structure will help it fill out (though don’t point them downwards as they’ll probably die). The end result will be a lovely natural-looking spot to seek shade, read a book in, or whatever other use you find for it.
2. A living willow fedge

A willow fedge is a cross between a hedge and a fence. It can be used as a more organic-looking alternative to a fence – much more interesting than a wall of brown timber. They’re a good way to divide and section off your garden, creating different rooms or zones.
To make one, plant a single row of long willow whips about 25cm apart, each leaning at a 45-degree angle facing alternating directions. This will allow you to weave a lattice-structured fence which can be cut to the desired height. A willow fedge is that simple.
3. A living willow wigwam or dome
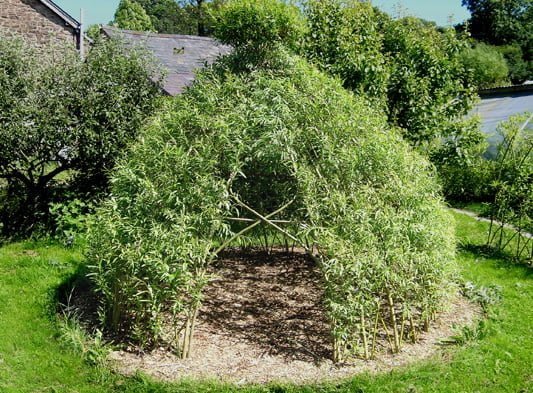
Although more complex to erect, these make good kids’ play areas or garden picnic spots – though they’re not guaranteed waterproof. To make a living willow wigwam, plant long sturdy willow whips about 30cm apart in a large circle. Leaning in alternate diagonals, with the strongest whips either side of your doorway.
Then fill in the gaps with smaller willow whips, depending on how thick you want the walls to be. Then weave the ends together at the top to create a beautiful intertwining roof. Or, for an easier project, just bundle them together to make a tepee-style roof.
4. Maintenance and aftercare for living willow structures

Willow, being suited to wet swampy conditions, needs a fair amount of watering, especially immediately after planting. Aim to water living willow structures every day for the first week, switching to every other day the next fortnight after that before easing off slightly (though this does depend on the weather you’re having).
Although willow’s prolific growth rate makes it perfect for a variety of garden structures, the downside is that regular pruning is a necessary evil. This will help your living willow structures fill out and strengthen with regrowth, instead of just growing taller and taller.
That being said, the willow whips that are removed can be used to make more designs, so it’s a fruitful chore. You could also use the whips to make willow baskets or sculptures – there are lots of courses for this nowadays.
Aphids (greenfly) are partial to willow, and in late summer can infest the plant and produce sticky honeydew which wasps are attracted to. Deer and rabbits are also a foe, and they are susceptible to various fungal diseases, so keep an eye out for this.
Sourcing willow whips
Simply cutting stems from any willow tree (preferably from the species listed above, and preferably asking the owner before you do so) lets you create a willow structure free of charge. There are also easy kits available on the Willows Nursery website and MusgroveWillows.co.uk.
Other useful articles about living willow structures and fedges
With these links and advice you should have everything you need to create your very own living willow structures or willow fedge.

by Mark Bailey | Apr 18, 2018 | GardenLife Magazine, How to guide

Gardening for bees and planting for pollinators
Would you like an excuse for a few weeds and untidy areas in your garden? Well you have a brilliant one; bees.
Or rather pollinators – because contrary to popular belief, it’s not just bees that pollinate our gardens, but various flies, beetles, butterflies, ladybugs and moths as well.
Basically, any insect that flies from flower to flower to feed themselves or their larvae is helping your garden grow.
It’s well known that bees are having a hard time at the moment – hives are under attack from parasites and disease, and pesticides can harm them (and other pollinators) – hence the EU banning the use of neonicotinoid insecticides.
So, what can garden owners do to save our bees and other insects? And why does it matter that we do this?
To start with the final question, it matters because without bees or pollinators, most of us would struggle to get the food we need. About one-third of the food on our plates is dependent on pollination (there’s more about this – and about what pollination actually is – on a good BBC website article about whether we’d starve without bees).
If you’d like to do your own bit to safeguard the UK’s crucial pollinators, what can you do in your own back garden?
Here are six steps covering gardening for bees, planting for pollinators and other ways to help butterflies and insects to their thing.
1. If you’re looking for a great hobby, you could keep bees yourself
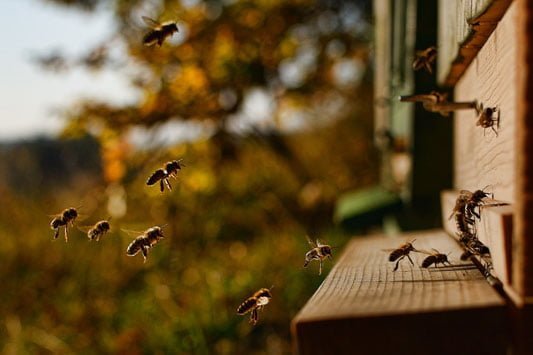
The British Beekeepers Association offers advice and training courses all around the UK, if you’d like to have your own hives and honey sources.
But for most of us keeping our own bee hives is a step too far. And anyway, not all bees and pollinators are hive-based. The habitats of solitary bees, hoverflies and other insects are under threat not just from changes in agriculture, but from people making their gardens too manicured or – even worse – covering them with low-maintenance gravel or decking. Therefore you could consider gardening for bees and…
2. Make your garden bee-friendly with plenty of pollinator nest sites

Good habitats for pollinators include dead wood, ponds, and bare ground. This is a great excuse for a touch of neglect or organised chaos, and with more pollinators around, the other parts of your garden are more likely to thrive.
Some types of solitary bee nest in hollow stems, such as bamboo, or herbaceous plant stems, so incorporate these into your bee garden design too. You could drill holes in fence posts or logs, or make (or buy) your own bee hotel with bamboo canes or cardboard tubes.

Whether you buy a bee hotel, or make your own, be sure to position it somewhere sunny.
The RSPB has a good guide to building your own, and there are plenty of ready-made designs on websites like notonthehighstreet.com (and they make excellent gifts for gardeners who have everything).
3. Planting for pollinators; choose nectar and pollen-rich plants

We all know pollinators like flowers, but there are some finer points to note here.
Firstly, go for diversity in your planting. One threat to pollinators has been the move towards monoculture – so gardeners can counter this by planting a rich array of different flowers, and also letting some wildflowers grow.
Secondly, bees generally prefer open-flowered varieties of plants to fancier, double-flowered ones, because the latter tend to prefer less pollen and nectar.
Thirdly, according to Gardeners World magazine, bees see purple more clearly than other plants. This makes lavender, alliums, buddleia and catmint great bets for pulling in the pollinators.
If you want to know more about different bee-friendly flower varieties, take a look at a great gardening guide from Defra (Dept for Environment, Food and Rural Affairs) which even tells you which flowers appeal to long-tongued and short-tongued bees respectively!
4. Gardening for bees goes beyond the summer months

Another way to do your bit is to plant early and late-flowering plants. This will also make your garden look better for longer.
Early-flowering plants could include fruit trees, hawthorn, forget-me-nots, hellebores and crocuses. And this may be anathema to those who have battled dandelions for years, but they too (along with white deadnettles) can be good early sources of pollen and nectar.

When it comes to gardening for bees and planting for pollinators good late-flowering plants include dahlias, fuchsias, sedums, Michaelmas daisies, sedums and marigolds – all of them easy to grow.
And remember, “a weed is just a flower growing in the wrong place”, so maybe a few dandelions, daisies and buttercups could go ignored the next time you consider getting the weed killer out.

For a more encyclopedic guide to planting for bees and pollinators, take a look at the RHS Perfect for Pollinators lists of garden plants and wildflowers.
5. Yes to gardening for bees means no to using pesticides

The arguments rage about the effects of pesticides on bees and other pollinators. But basically, if you can avoid them, do so, and use other methods as far as you are able – for example, organic products or biological methods. Hoverflies and ladybugs are both pollinators, but they also feed on aphids )a common pest that most gardeners try to get rid of).
If you must get out the pesticide sprays, avoid spraying on open flowers, and follow label instructions carefully.
6. Pollination can be thirsty work

Bees and other pollinations will often need to drink in summer, so the RHS recommends using a shallow dish filled with stones or marbles and water as a safe water source for them. The shallow edge of a pond can also be a good water source.
So, there we are, gardening for bees and planting for pollinators in six really easy steps. These suggestions can improve your own garden, but they’ll also help with global food security and biodiversity as well. That surely must be on your gardening to-do list for 2018.

by Mark Bailey | Dec 15, 2017 | GardenLife Magazine, How to guide

Garden security: tips for securing gardens and outbuildings
Most of us are fairly clued up about the security of our homes – with alarms, multiple locks, movement sensors and security lights being commonplace. As a result, crime stats show you were almost four times less likely to be burgled in 2017 than in 1995!
But whilst we’re impressively canny about protecting our homes, too many of us are still prone to neglect the outside of our homes, with little or no thought to garden security. There’s a garden theft around every 8 minutes in the UK and the financial toll can be heavy – especially if you have expensive garden furniture or tools, or a garden office or workshop.
According to one insurance company the most commonly stolen items are bicycles and power tools, but also vulnerable are garden furniture, ornaments, plants and oil tanks. Thefts reported have even included a window, turf, fireworks, and gold bullion!
So here are some easy and accessible garden security tips on how to make your garden and outbuildings more crime-proof.
Natural ways to enhance garden security

If you don’t fancy splashing out on high maintenance gadgetry, adopt a more horticultural security approach – planting prickly ‘defensive’ plants and shrubs like pyracantha, berberis or a native evergreen holly (there’s a good list of thorny hedges on the Hedges Direct website and the Thompson Morgan site has some good suggestions too).
These can make uninvited visitors life decidedly trickier and halt them in their tracks or bring them to your attention (perhaps through their exclamations of pain or annoyance), whilst also looking great. As an added bonus, the berries on shrubs like pyracantha and berberis can also be wildlife-friendly (the RSPB has more useful advice on bird-friendly berries if you are interested).
Spreading gravel or creating a gravel path also makes an inconspicuous approach impossible, while installing wooden or even spiked trellises on top of your walls can deter entry and improve garden security. You could even install planters down your walls and thorny climbing roses or spiky vines to stop people clambering over them. During the day you can enjoy looking at the planting whilst easily avoiding the prickles and thorns, but at night (to unsuspecting thieves) the plants can help to secure gardens and outbuildings.
Improve garden security with structure
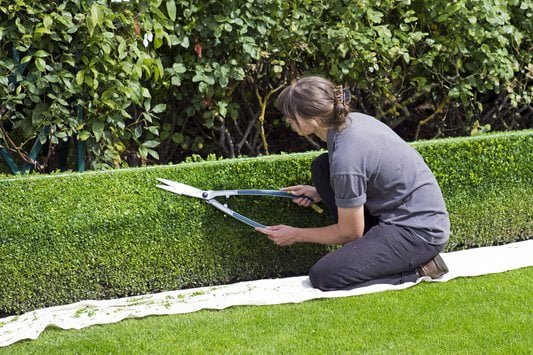
Making your garden and its contents more secure need not even require money or specialist equipment and gadgets – the layout itself can help improve overall garden security.
Simple things like keeping hedges and shrubbery low to starve would-be intruders of hiding spots or cover can go a long way. Saga suggests limiting them to around 1m high. This keeps them hard to hide behind, but still tall enough to break up your garden or create the ‘rooms’ so beloved of garden designers.
Also useful is to make sure your house has an unobstructed view of your outbuilding, workshop or summer house – this makes sloping or slightly sunken plots perfect. It’s also wise to locate your outbuildings with the doors facing your main view of the garden with a clear line of site.
What tech can help increase garden security?

The options here can start from £20 or less – with simple security lights or battery-operated shed alarms. You can get a good idea of the options at Maplins or other electronics or DIY/home stores.
Heading up the technology scale, motion-sensing floodlights are popular for improving garden security and can come in at well under £100. That being said, if you have a pet, the strobe-like lighting that can ensue each time it goes outside can get tiresome!
Lights which only come on certain times (e.g. you can programme them to work from dusk till dawn) are also available. You can find a solid selection of outside security lights at sites such as Lighting Direct and The Lighting Superstore.
For garden owners who are more anxious or have more to protect, web-linked CCTV cameras that can stream real-time full HD video to your phone or computer can come in at under £200, although installing them might require a tech-savvy helper and a speedy internet connection.
And although likely the most expensive measure, a garden alarm can both catch and deter intruders – Ultra Secure Direct has a good selection of specialist wireless garden alarm systems (including a telephone and text message alarm disguised as a bird nesting box).
Secure garden outbuildings
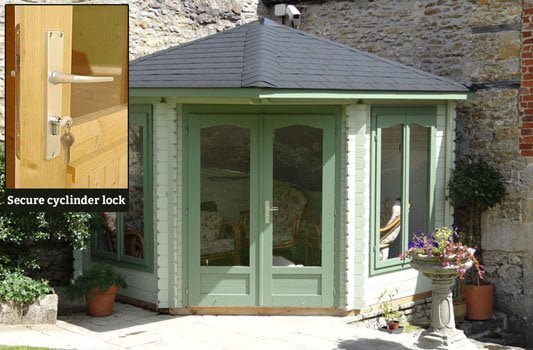
If it’s the contents of your shed or office you’re worried about, you might want to upgrade to a more security-conscious garden building. Having a building with sturdy cylinder locks, laminated doors, double glazed windows and 28 – 70mm thick timber walls can all provide added protection, and keep out opportunistic visitors. And into the bargain, you get a warmer, better insulated space for working, entertaining or relaxing.
Does home insurance cover garden security?
Taking out an insurance policy on the contents of your garden – or just checking if your current insurance covers summer houses and garden outbuildings – can also go some way to give you peace of mind should the worst happen. It is worth checking what your current insurer covers; it’s surprising how many policies don’t cover theft from the garden or an outbuilding.
The common sense approach

If it ain’t broke, don’t fix it – if you’re not in the mood to make major changes, simply buying an additional door or window lock will boost your security. As for garden ornaments and statues, well, actually you could fix them – anchors can help make sure no one makes off with them.
Even obvious things such as making sure side or back gates have locks, and then remembering to use them, can make all the difference. Making sure to put garden equipment or furniture back in their resting places can also prevent opportunistic passers-by from making a quick buck at your plot’s expense. Sometimes it’s just the little things that can help improve your garden security and prevent a theft.
by Mark Bailey | Nov 30, 2017 | GardenLife Magazine, How to guide
Put off garden decking ideas by 1990s TV garden makeovers? Don’t be, it offers unique and creative design possibilities, many of which you won’t have ever considered.

Garden decking has become a victim of its own success over the past few years – the subject of so many late 1990s TV garden makeovers that garden designers adopted a sneer whenever they heard the word. And that’s a huge shame, because decking can be used to create brilliant garden designs – practical, affordable, creative and interesting.
With winter greatly reducing the number of other parts of the garden requiring attention, now is a great time to think about decking. Indeed, looking out the window at an under-used muddy back garden could well provide the incentive to use decking to create a more inviting space. Just make sure you wait until the rain stops before installing it – otherwise you may face an epic battle with mud and damp wood.
Here are some ways you can use traditional garden decking to give your plot more interest and functionality.
The classic garden decking BBQ and patio area
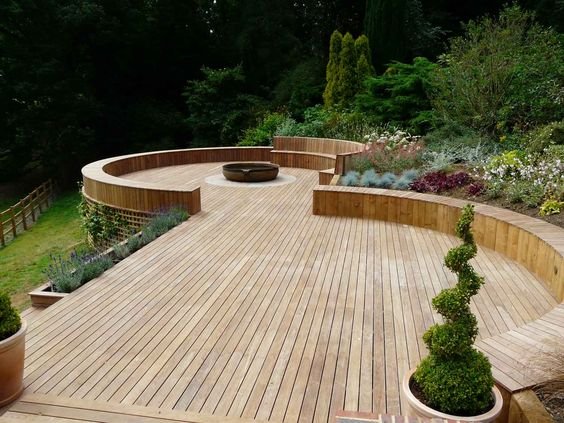
This is the best-known use of decking, so beloved of the TV makeovers. There it was used because it was quick, cheap and cheerful – easier to accomplish in two days than actually growing something.
Decking is certainly easier and more flexible than paving or concrete. And it’s ideal for creating a level surface in a sloping garden.
But decking is not just a matter of easy answers. Pinterest has beautiful ideas for using decking imaginatively, and garden writer Anna Pavord recommends getting creative with the colours of decking – looking at shades such as “watered-down green”, soft grey or “patchy olive green”, set off by contrasting flowers in pots. Using decking diagonally or at different angles can also look brilliant.
Vertical garden decking ideas and zoning
Decking need not be limited to the ground – incorporating it vertically into your garden walls can make urban gardens feel more natural, and softer on the eye. And different woods can create different moods – for example, cedar can introduce a Japanese feel.
Decking – horizontal and/ or vertical – can also be used to section off a particular area of your garden or patio, for example to create a raised lounging, play or al-fresco dining area.
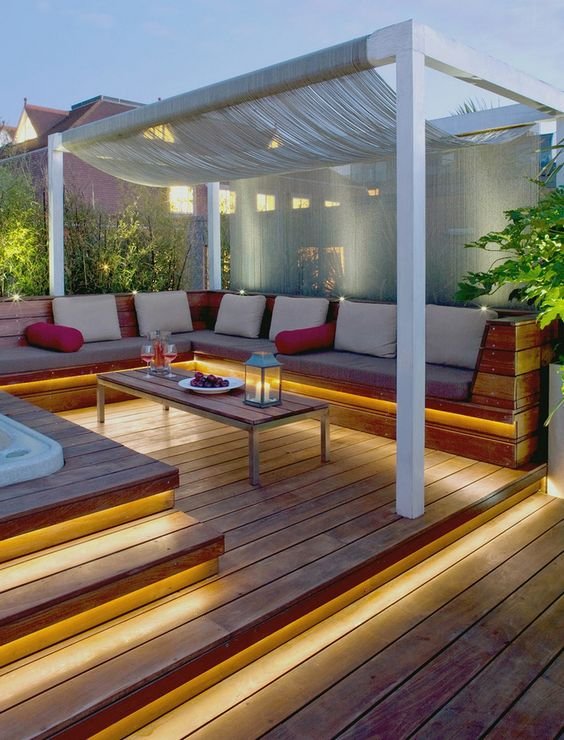
Lighting can be integrated into floors and walls – for example, uplighters put into paths and patios for security; downlighters put into decking walls; or LED strips hidden under decking edges. You’ll find some tips and ideas for this at www.exteriorlightsuk.co.uk and www.philips.co.uk.
Speakers can also be set into the woodwork, as can sofas and benches. Planters or trellises can also be incorporated into vertical or horizontal decking designs if you want to break up the wood with some greenery.
Decking or wooden rails can also be used to create a roofed area or pergola, offering some shade and creating beautiful shadow effects. The trick here (as with decking walls) is to think about the spacing of the wood – too close together and the area may look like a sauna.
Garden decking foundations and structures

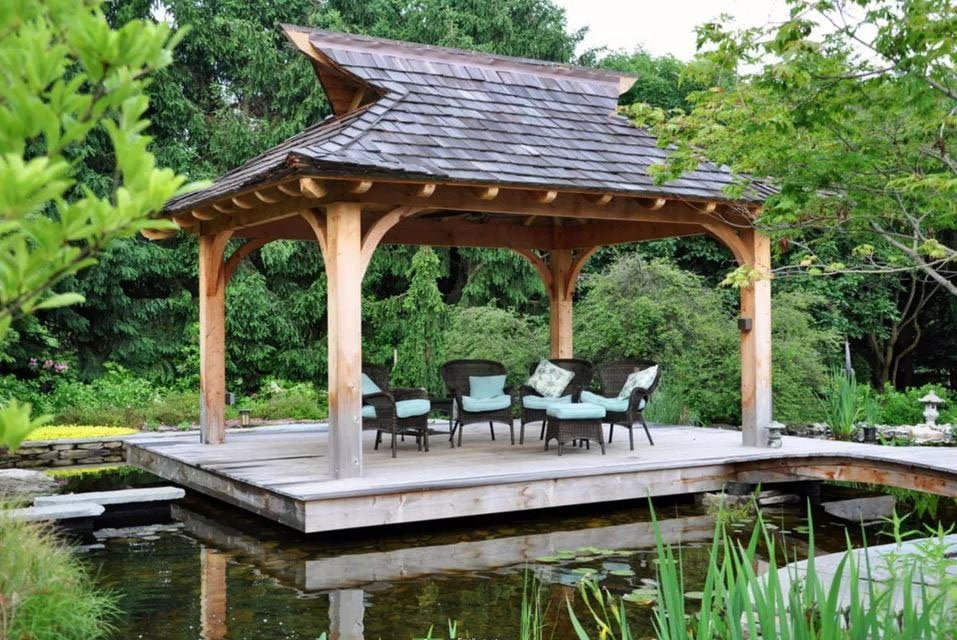
At a practical level, decking can be invaluable if you’re thinking about installing a garden building. Using it around and underneath garden sheds, storages or summer houses will not only raise them and create a vantage point, it’ll also protect against damp and insects.
Here too, you can be creative, using colour, material and design to contrast or blend with anything from a garden workroom to a gazebo.
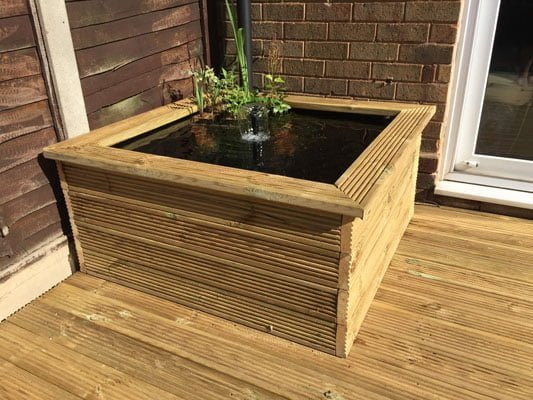
You can also combine decking with other structures – from wooden storage units to raised beds or wall-mounted planters – to create interesting textures and surfaces.
Garden paths made from decking?
One reason why decking got a bad name is that people simply ripped out whole lawns or borders and covered them over with an expanse of monotone wood. It’s not just the aesthetic effect people bemoan here; there are warnings that covering over gardens with paving or decking can exacerbate flooding or remove wildlife habitats [PDF].
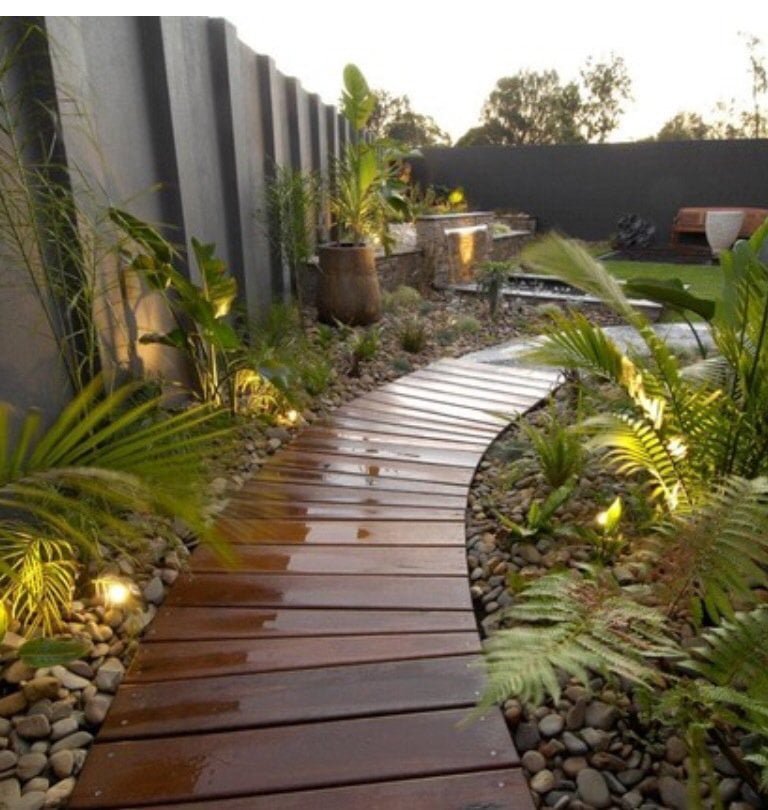
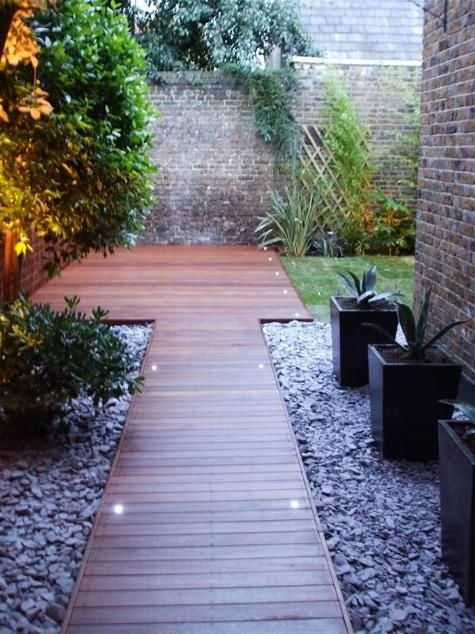
Buck decking can be used more sparingly to make paths, either raised or flush with the lawn. Not only does this prevent a well-used path across a lawn from becoming a bog, it also create a pleasing ‘journey’ effect that breaks up a space, and is a nice modern substitute for stone or gravel.
Different types of decking materials
The cheapest decking option is usually a pressure-treated softwood, such as pine, available from around £25 sq m. Cedar and redwood are also popular – though more expensive softwoods, with some natural protection against rot and insects. These are usually somewhere from £25/m².
Hardwoods such as oak or teak, although more expensive, are more durable and aesthetic. When buying timber, look for Timber Decking Association-approved wood which tells you it’s of a decent standard.
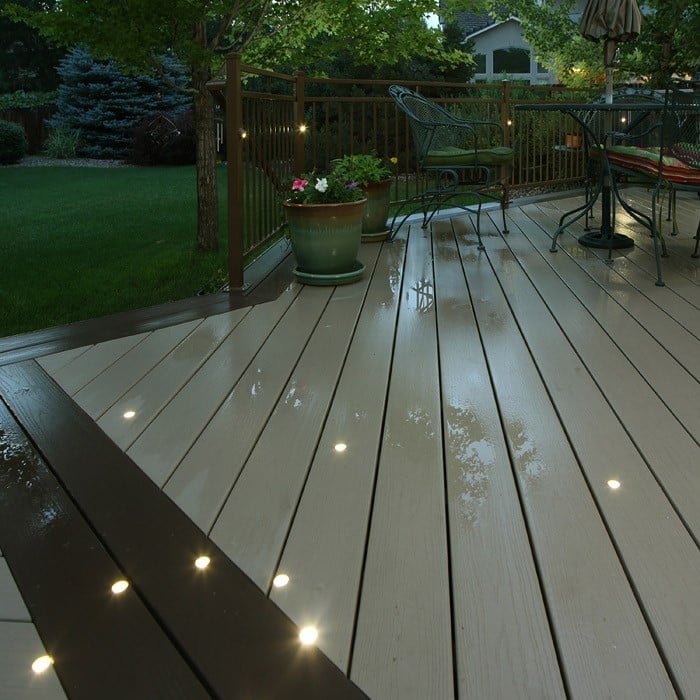
And then there is composite wood decking – a mixture of wood particles and plastic – which is weather-resistant and hard-wearing but doesn’t look like real timber. There’s more advice about choosing your decking material available on this website.
DIY garden decking ideas – the practicalities

In terms of installation, there are plenty of basic DIY guides online. Useful ones include:
Larger or sloping areas will likely require professional installation – setting you back in the region of £500 or thereabouts – and will probably require planning permission if above 30 cm high. It’s a long-term investment though, given that you maybe able to get 3 decades out of good quality decking.
With all wooden decking, there are practicalities to think about. If neglected, a decking path may turn into an ice rink in the winter months, fitting it with chicken wire could be useful. There are also anti-slip solutions from providers such as Gripsure and Deckwright, which can prevent damp decking from turning into a slippery, slimy health and safety hazard, and are readily available in DIY chains.
And finally, on the maintenance front, all types of timber decking will need to be cleaned, sanded and resealed every year or two. For basic cleaning – preventing or dealing with the dreaded algae – there are plenty of cleaning products available in DIY stores. There are some eco-friendly cleaning recommendations on the Amatuer Gardener website.


