by Mark Bailey | Oct 23, 2014 | How to guide, Timber building videos
How are large garden buildings delivered?
GardenLife have been involved in the design, manufacture, delivery and installation of summer houses, timber offices, log cabins, pavilions and other garden buildings for many years, and when it comes to delivery, we’ve always been able to ship our products to the desired location. Tight turnings, narrow driveways, tall hedges and trees, limited access to gardens – these issues have never stopped us from delivering a garden building as close as possible to the build site.
It’s understandable however, that investing in such a substantial structure can lead to concerns about packaging, shipping and the delivery day itself. For that reason, GardenLife filmed the delivery of one of our biggest garden rooms, to show how straightforward deliveries are (even those involving large garden buildings, such as the Laggan, measuring 6.4m x 3.5m).
Secure packaging
One question commonly asked, is how are garden buildings packaged? As you can see in the video above, all GardenLife buildings are delivered flat pack, and before they leave the factory, all the parts are carefully positioned on timber carrying frames and shrink wrapped in water proof plastic. The carrying frame helps ensure that timbers remain completely flat during the shipping process, and the plastic wrapping helps keep all the wood dry (which means you don’t have to worry about building the summer house the second it arrives). Smaller buildings often fit in one package, but the larger timber buildings (such as the Laggan) come in three carefully wrapped parcels.
Careful delivery
GardenLife always contact customers to arrange a convenient day for delivery, and we ensure that our buildings are only ever dispatched using a Hiab truck with a front-mounted crane. This allows the delivery driver to get close to the delivery site, but even when obstacles stand in the path of the truck, the extending crane allows the driver to lift each package over hedges and fences, or around trees and buildings. You can see in the video above, the experienced driver is able to lift large sections of the building over hedges (whilst keeping the crane below overhanging wires) and then carefully position the timbers in a confined area not much bigger than the package itself.
GardenLife take care of wrapping up your garden building, keeping it dry and flat. We always ensure we deliver at a convenient time, with advanced notification of the delivery date, and our experienced drivers and crane operators ensure that your new garden building is delivered safely to your chosen construction site. If you have questions or concerns about delivery please don’t hesitate to get in touch or give us a call on 0131 660 6333.
by Mark Bailey | Sep 4, 2014 | How to guide, Timber building videos
Self assembly timber garden office video
If you’re looking to start a new business from home, or if your current home business is in desperate need of additional storage or meeting space, you could consider a timber garden office as an alternative to a portakabin, a costly house extension or renting office premises at another location. Renting office space and extending the house are expensive ventures, and a portakabin isn’t the most attractive location to run a business from. However, a timber garden office can prove highly cost effective; a low purchase cost (when compared to extending and renting), quick self assembly and minimal ongoing maintenance.
Portakabins and house extensions require planning permission, and although this might still apply with the siting of a timber framed office in your back garden, if you can position your garden office a couple of metres away from the boundary, and buy a design that’s 2.5m in height (or less), you may be able to avoid the hassle of obtaining planning permission altogether.
GardenLife Log Cabins specialise in a whole range of different timber framed building styles, all of which are designed for self assembly (even for those who aren’t great at DIY). Despite this, GardenLife also stock a number of modern timber garden rooms and offices that feature a modular Quick Fit design, which is perfect if you’re not that confident with DIY, but still want the pleasure (and reduced cost) of a self build project.
The self assembly timber garden office video above showcases what is involved in constructing the Fiona contemporary garden office. The self build Quick Fit kit for this garden office is delivered with the bulk of the elements already pre-assembled; walls are provided as modular wood framed panels that simply slot together, and the windows and doors are already built, as are the roof frames and apexes (the only separate parts are the foundation joists, floor boards and roof boards). As you’ll see in the video, the tools that are required are a hammer, screwdriver, drill, saw, spirit level and staple gun (although you can use tacks on the roofing felt if you don’t have a gun).
The self assembly video shows two professional installers completing the installation process in about six hours (with a couple of hours for unpacking and organising the parts). So if you’re not a DIY regular, a day in the garden should be all you need to self build your own timber garden office; far less stress, hassle and cost than an extension. If you’re still not sure about undertaking the task, don’t fear, GardenLife can arrange installation for you, just get in touch to find out more.
by Mark Bailey | Aug 18, 2014 | GardenLife Magazine, How to guide
The vast majority of GardenLife’s buildings come with a pressure treated timber base, but one of the fundamental rules for any garden building is that you need firm, level foundations onto which you can secure your base. If the ground beneath the summer house or log cabin is uneven, the screw holes on the walls may not meet up properly, and the walls may distort, with individual timbers opening up or bowing outwards.
Uneven or unstable foundations can store up future problems too. Subsidence may cause timber walls to warp, making doors and windows fall off square. You may also experience problems with leaks and damp.
So, preparation is everything when it comes to choosing the best foundations for a summer house or log cabin, and there are various options available, the main ones being:
- concrete
- paving slabs
- timber decking
Unfortunately each option has its own advantages and disadvantages, so there is no single right answer, and some foundations suit different garden building types and sizes.
Concrete foundations for a summer house?
 The usual advice for concrete is to put a 7-10 cm layer of concrete above 7 cm of compacted hardcore. Having the foundations raised slightly above the ground level encourages water to run off rather than pooling around the base of the summer house. If you’re planning on buying a smaller summer house, concrete foundations may be a little excessive as you may be able to use paving slabs or decking instead. Concrete foundations are however suitable for larger, heavier timber garden buildings such as log cabins and more sizable garden offices.
Pros: Concrete foundations are permanent, stable and non-shifting – this is especially important for larger buildings. It also allows for very sturdy anchor points to which you can secure the timber base. The concrete can also provide the floor for workshops, storage sheds and garages (which can make the purchase of a garden building cheaper, as there’s no need for a timber floor).
Cons: Concrete is not an eco-friendly option as its production causes a significant release of carbon dioxide (a greenhouse gas). Other disadvantages include the fact it is relatively expensive compared to other bases (especially if you have it laid professionally). And finally, it does not allow water to drain away, so the timber at the base of the cabin may suffer damp problems. Nevertheless, despite the problems, concrete foundations are a popular and low-maintenance option for log cabins, and the potential problems with damp timber can be avoided with careful maintenance of the building and sensible treatment of the timber.
Paving slab foundations for a summer house?
 Paving slabs can be laid on a base of sand and cement, with anchor points at the corners. The slabs should be evenly laid, and firmly butted together. Having them raised slightly above ground level will help water to run off. Paving slabs are best suited to smaller garden buildings and are not recommended as a foundation option for large log cabins.
Pros: A foundation of paving slabs is relatively easy to lay, and they can make an attractive patio area in front of a summer house or log cabin. Like concrete, they are low-maintenance, and stable, however, they are easier to remove than concrete if you want to redesign the garden.
Cons: Like concrete, paving slabs don’t allow water to drain away, so there can be problems with damp if rain pools around the building. However, using wood preservation treatments on your summer house can protect against damp and rot. If the ground below the paving slabs is not stable (if they’re placed directly onto grass, gravel or soft soil), they may subside, causing problems with warping.
Timber decking foundations for a summer house?
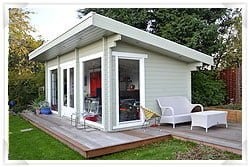 It’s possible to build your cabin on foundations made of secure, level timber decking, with a weed-proof membrane between the ground and the timber. The timber must be pressure-treated to withstand damp. Concrete anchor points at the corners can be used to secure the building, or the pressure treated timber base can be screwed directly into the decking foundations. Timber decking is attractive and works well with summer houses and log cabins of most sizes.
Pros: The decking can be used to create a verandah area, so it can look highly attractive. Ridged decking allows water to run off, helping prevent damp problems around the walls of the building. The space underneath the decking allows air to circulate and prevents damp from rising.
Cons: Timber decking may not be suitable for larger cabins. A small area of decking in front of a summer house may not cost much, but to extend decking under an entire garden building (where it will be completely hidden) can push the price up. Even with pressure-treated timber, regular maintenance and wood treatment will be necessary, with an annual wash a treatment with decking oil necessary.
If you are considering purchasing a timber garden building and need some advice on the best type of foundations for a summer house or log cabin, get in touch and we’d be happy to help!
by Mark Bailey | Jul 22, 2014 | How to guide, Timber building videos
Timber summer house construction video
Planning to build your own timber summer house or garden room this year? This helpful video from GardenLife shows time-lapse footage of how the Wye clockhouse style summer house was built by our construction crew. The first stage requires laying out all the individual parts of the summer house; timber wall logs, windows and frames, doors and door frames, roof purlins, roof boards, floor boards, shingles and fixings.
GardenLife summer houses come with clear instructions, and the installation process (once the base is fixed in place and level) is similar to building with Lego, with tongue and groove timbers simply slotting into each each other. The door frame can be assembled and slotted into place when the walls are about 60cm or two feet hight, and when the timber walls reach about half the total height, the window frames slot in, the windows slide onto the hinges and the walls can be completed.
In the timber summer house construction video purlins are added to the roof next – these may require a little trim to ensure the top of the purlin is level with the roof line. Once the purlins are in place, the roof boards go on, again slotting together in the pre-cut grooves. Shingles are added from the bottom of the roof line upwards, and there’s a handy trick to ensure that you end up with a professional tile-effect finish on the roof.
When adding the floor boards leave a 5mm gap around the edge of the floor (to allow for natural movement and swelling in the timber), then cut and position the supplied edging strip to cover the gap. At this stage in proceedings your summer house will nearly be complete, and you will just need to add window latches and drill a couple of holes for the door bolts.
Don’t forget, as soon as the weather looks like it will be dry for a good few days, it’s time to get some timber treatment on. Good quality wood preserver that stops rot, insects and fungus is essential, and once this has had time to try (or even a second coat), you can then think about applying a couple of coats of trade quality exterior paint or log cabin oil. GardenLife are happy to provide advice on the best types of summer house timber treatment, and can also recommend eco-friendly timber treatments too.
by Mark Bailey | May 30, 2014 | GardenLife Magazine, How to guide
 If you’ve ever browsed eco gardening forums or bee-keeping websites, you’ll have come across debates about the use of wood treatments and paints. The debates focus on fears that conventional oil-based treatments, when used on beehives, planters or raised beds, harm bees and could contaminate the veg.
These concerns are sometimes applied to other garden buildings too – GardenLife customers occasionally ask us whether conventional wood treatments are safe for children, pets, wildlife and plants. Is it possible, they want to know, to buy alternative timber treatments that are environmentally-friendly, pet-friendly, children-friendly and bee-friendly, and also, of course, effective at preserving the timber?
The trouble with looking for advice online is that most debates about environmentally friendly wood treatment products are a confusing mixture of passionate opinion and highly technical information about chemicals. They also give tips that are unfeasible for most of us. For example, one common recommendation is to use timber such as cedar, which has innate insect-repelling properties. But a cedar garden house or home office is far beyond the budget of most of us, and not a viable proposition.
Therefore, instead of getting simple answers and advice from these green advice forums and eco-friendly websites, you often end up more confused – and anxious – than before. So, what are your options if you don’t want to use petroleum-based and metals-based preservatives, but still want to protect your wood against rot, insects and weather? What’s the best eco-friendly timber treatment?
Linseed oil is mentioned regularly as a natural wood protection, with good preservative properties and water resistance. On the other hand, critics point out that it is highly flammable, very slow-drying and sticky, and doesn’t protect wood from UV sunlight or mildew.
We’ve also seen other natural wood preservatives recommended such as salt, soy, vinegar, alcohol and tannins. They’re safe for humans and do provide some protection against various forms of attack. However opinions differ as to just how much protection they provide for a garden building, especially one in a dampBritish climate.
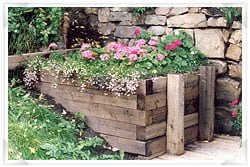
 More effective (and easier to source and apply) are a number of commercial, eco-friendly timber treatment solutions that are water-based. Valhalla Wood Preservatives makes a popular treatment called LifeTime® Wood Treatment, which has long been used in Canada and is now available internationally. The product is non-toxic and ‘friendly to plants, animals and people’, and also low-maintenance. Since it does not leach residue into soil, it’s useful for garden planters too.
Naturally, with a successful product like LifeTime® Wood Treatment, the ingredients are a close kept family secret. However, the treatment is made up of naturally occurring plant and mineral substances which soak into and penetrate wood fibres. Independent laboratory testing confirms that LifeTime® creates no harmful residue in soil or water, which is also reassuring
Conventional wood treatment products that are on the market are more health-friendly than previously, but if you have concerns about noxious chemicals and their environmental and health effects, then LifeTime® Wood Treatment is something that you should look for when it comes to preserving your summerhouse, log cabin or raised beds.
by Mark Bailey | Apr 25, 2014 | GardenLife Magazine, How to guide
An unloved summerhouse is a very sad sight. A vintage look is one thing; flaking paint and greying wood are quite another. Giving a shot of colour to a neglected summerhouse is a great way to refresh your garden and give it a new focal point. It will also prolong the life of the timber.
Wondering how to look after a summerhouse? Well, if you’re breathing new life and colour into a garden building, you need a blank canvas. Remove any algae, lichen or fungus with a fungicidal wash, then strip back existing stain, paint or varnish to the bare wood. You can now think of your summerhouse as ‘new’ and treat it much the same as a newly-bought one.
The best way to treat timber garden buildings

When you buy a softwood garden building, treat the timber with wood preservative as soon as possible. If you’re erecting the summerhouse or garden room yourself, treat the floorboards before you build it, especially the undersides. Doors and windows should also be treated in advance.
The rest of the garden building should be treated as soon as possible after you erect it – both outside and inside. Untreated wood turns a grey-ish colour, and is vulnerable to rot, decay, mould and insect attack. Wood preservative prevents this.
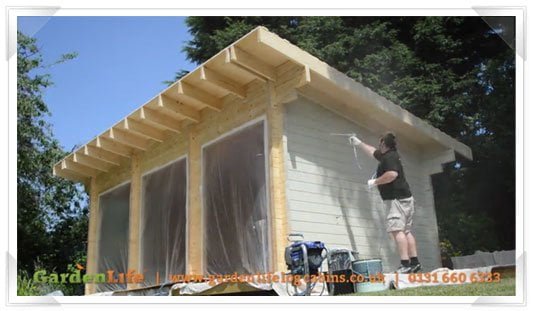
GardenLife recommend products such as Cuprinol Trade Wood Preservative, available from good paint and DIY shops. Always follow the instructions on the tin about application, number of coats and drying times. Pay particular attention to cut ends and joints, and don’t start the treatment when it’s threatening to rain. Once the preservative is dry, you should paint, stain or varnish your summerhouse to protect the timber from sun and rain.
Should I paint or stain my summerhouse?
If your garden building is constructed from good-quality timber, a translucent wood stain lets the grain show through and looks more rustic. But if the timber is nothing amazing and you’re more interested in colour than the wood underneath, an opaque paint should serve you well.
Butinox has a great range of wood stains and paints, which are ideal for the smooth, finished timber of the GardenLife range. They also give excellent protection for old and new timber. The translucent stains (Butinox 1) come in a wide range of wood colours, from pale Yellow Pine and Sugar Maple to Black Walnut. There are also attractive dark green and blue stains.
Butinox 2 is a range of opaque stains, from a great chalky white through various yellows, greens and blues, to ebony. There’s an oil-based range (Butinox 3) in the same colours, suitable for brick, stone and concrete as well as wood. You need to use a primer with both Butinox 2 and 3.
Other ranges suitable for cabins include Dulux Weathershield Aquatech, and stains and paints by Sadolin and Sikkens. It is really important to use products that are suitable for cladding, and not just exterior doors and windows. There are also some specialist eco-friendly wood preservatives and stains on the market, which we’ll discuss in a future blog.
What colour should I paint my garden building?
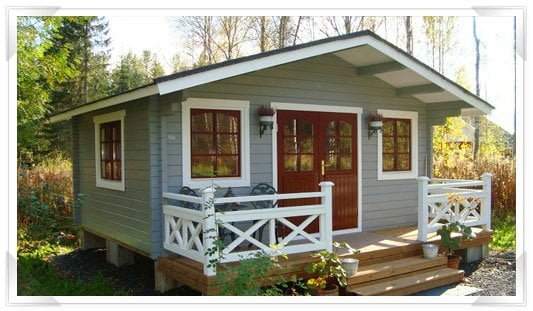
When thinking about colour, decide whether you want your summerhouse to make a statement or blend in with the background. If you have shrubs and trees, dark green camouflages a garden room (useful if you have an old building you don’t particularly like). Grey-green and grey-blue look sophisticated and classic, whilst pale greys, creams and stone hues are very ‘New England’. White can look dreamy on a bright summer day, but somewhat washed-out in a British autumn.
Sky blue is summery and retro, especially with Cath Kidston-type prints, but too beach-hut for some gardens. Ditto with pastel pinks and yellows, which may be perfect for a children’s playhouse, but aren’t exactly chic and sophisticated.
If you’re really planning to make a statement – with anything red or purple –don’t do it on impulse. “Vibrant and quirky” may pall after a few months, and may also arouse feelings of rage among the neighbours!


 More effective (and easier to source and apply) are a number of commercial, eco-friendly timber treatment solutions that are water-based. Valhalla Wood Preservatives makes a popular treatment called LifeTime® Wood Treatment, which has long been used in Canada and is now available internationally. The product is non-toxic and ‘friendly to plants, animals and people’, and also low-maintenance. Since it does not leach residue into soil, it’s useful for garden planters too.


